



Sensory Bin Toys: Vetted Kits vs. Easy DIY Bins
For most parents, the fastest way to get safe, developmentally rich sensory play is a vetted sensory bin toys kit, or a simple DIY starter bin if you would rather customize on a budget. Either path works: sensory play’s real value comes from the process of exploring, not a picture-perfect setup, so a bin of dry beans and kitchen tools builds the same fine motor and problem-solving skills as an elaborate themed kit. The bigger difference is time. A kit is play-ready in minutes; a DIY bin takes a supply run and a little assembly.
- Choose a kit if you want safety-checked contents, clear age labeling, and zero prep.
- Build a DIY bin if you want to control cost, customize fillers, or already have pantry staples on hand.
Jump to the buying guide for kit criteria, or skip to the filler list to build your own tonight.
Key Takeaways
The fastest, safest route to sensory play is a vetted kit for convenience or a simple dry-filler DIY bin for cost control, matched to your child’s age and mouthing behavior.
| Point | Details |
|---|---|
| Match age to filler type | Use dry, taste-safe fillers like oats or pasta for mouthing toddlers; save water beads for reliably past-mouthing preschoolers. |
| Keep a ready supply tub | Store fillers and tools together so setup takes minutes, not a shopping trip, and play happens more often. |
| Favor dry fillers indoors | Rice, pasta, and pom-poms sweep or vacuum clean in under a minute, unlike wet or sticky bases. |
| Check kit labels before buying | Confirm age rating, non-toxic materials, full contents list, and refill availability on the product page. |
| Choose Thebestkidstoys for vetted kits | Every kit is checked for safety testing, age-appropriate design, and Montessori-aligned learning goals before it ships. |
Table of Contents
- What Are Sensory Bin Toys, and Why Do Parents Buy Kits?
- Starter Fillers and Tools for an Easy DIY Sensory Bin
- Ten Sensory Bin Themes and What Each One Teaches
- Which Ages Should Use Which Sensory Bin Materials?
- How Do You Set Up, Clean, and Store a Sensory Bin Fast?
- How to Choose the Right Sensory Bin Kit: Price and Safety Checklist
- How We Vet Sensory Bin Toys and Kits at Best Kids Toys
- What Do Other Parents Say About Their Sensory Bins?
- Choosing Sensory Bins for Sensitive or Sensory-Seeking Kids
- A Parent’s Take on Making Sensory Bins Stick
- Ready to Skip the Prep? Shop Vetted Sensory Kits
- Frequently Asked Questions
- Sources
What Are Sensory Bin Toys, and Why Do Parents Buy Kits?
A premade sensory bin toy kit bundles everything you need into one box: a filler (rice, kinetic sand, foam beads), a set of tools (scoops, tongs, small containers), a tray or bin to contain the mess, and simple instructions or theme cards to guide play. The appeal is obvious once you have tried building one yourself at 7 p.m. on a Tuesday. Kits save you the shopping trip, the guesswork about ratios, and the worry about whether that bag of craft beads is actually safe for a toddler who still mouths everything.
The tradeoffs are real, though, and worth knowing before you buy.
What you gain with a kit:
- Contents that have already been checked against choking and toxicity concerns for the listed age range.
- Clear age recommendations printed on the box, so you are not guessing.
- Ready-to-play setup, often under five minutes.
- A curated learning focus (counting, sorting, letter recognition) rather than random filler.
What you give up:
- Cost. A curated kit typically runs higher than assembling the same components yourself.
- Some kits include smaller parts that push the recommended age up, which limits use for younger siblings.
- Less room to customize a theme around your child’s current obsession, whether that is dinosaurs or garbage trucks.
When you are scanning a product page, look for four things before adding to cart: an explicit age rating, a “non-toxic” or material-safety claim, a full list of what is included, and a refill or replacement policy. Kits that skip any of these details are worth a second look before you buy.
Pro Tip: If a product page does not list an age range or material composition, email the seller before buying. A company confident in its safety testing will answer in one line.
Starter Fillers and Tools for an Easy DIY Sensory Bin
Building your own bin comes down to two decisions: what goes in it, and what tools your child uses to explore it. Get those two right and you have covered most of what a kit offers, at a fraction of the cost.
Taste-safe fillers vs. non-taste-safe fillers
Split your filler options into two buckets before you shop. Taste-safe fillers are things you would not panic over if your toddler took a bite: dry rice, dry pasta shapes, rolled oats, and dry cereal. These work well for babies and young toddlers who still explore the world mouth-first.
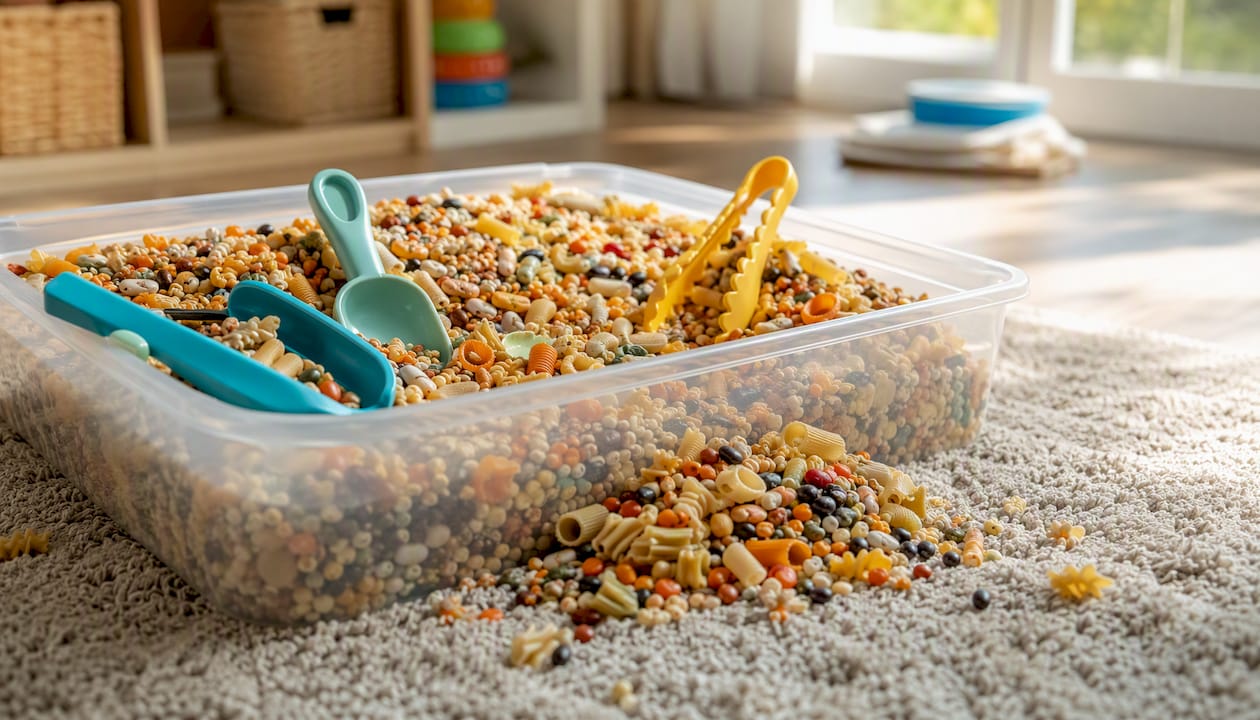
Non-taste-safe fillers include kinetic sand, water beads, and small craft pom-poms. These are excellent for preschoolers and older kids with reliable no-mouthing habits, but they carry real risk for younger children. Water beads in particular deserve caution: they start small, swell dramatically when wet, and have caused documented ingestion emergencies in young children. If your child still mouths toys, skip water beads entirely and choose a dry, taste-safe filler instead.
Parents who avoid food-based play, whether for classroom hygiene reasons or personal preference, have plenty of alternatives. A long list of non-food sensory fillers includes shredded paper, pom-poms, buttons for older kids, cotton balls, and craft foam shapes.
Tools worth keeping on hand
A compact tool set turns any filler into open-ended play. Keep these in a dedicated bin so you are never starting from zero:
- Small scoops and measuring cups for pouring practice.
- Kitchen tongs for grip strength and pincer control.
- Plastic funnels for cause-and-effect exploration.
- A handful of small jars or containers for sorting.
- Child-safe tweezers for older toddlers and preschoolers working on precision.
A quick shopping edit by age
For infants and young toddlers who mouth everything, stick to dry, edible-safe fillers like oats or dry pasta, paired with large scoops. For preschoolers with reliable habits, kinetic sand and water beads open up more textures and sensory input. For mixed-age households, keep separate bins rather than one shared bin, since safety guidance is consistent on strictly separating taste-safe and non-taste-safe bins when siblings of different ages play nearby.
Store water beads in a locked or high container between uses. A stray bead left on the floor is easy for a crawling baby to find and just as easy for you to miss during cleanup.
Ten Sensory Bin Themes and What Each One Teaches
Themes turn a bin of loose materials into a focused activity. Here are ten you can assemble in under fifteen minutes, along with the primary skill each one builds.
- Beach day — sand or rice, small shells, plastic sea animals. Builds tactile discrimination and imaginative play. Best done outdoors or on a washable mat.
- Construction dig — kinetic sand, mini dump trucks, small rocks. Builds grip strength and cause-and-effect thinking.
- Farm counting — dry corn kernels, plastic farm animals, small buckets. Builds one-to-one counting skills.
- Rainbow rice — dyed rice in six colors, scoops, clear cups. Builds color sorting and pouring control. Dyeing rice is an adult-only prep step; let it dry fully before handing it over.
- Garden mixing — potting soil, silk flowers, small trowels. Builds scooping strength, though this one is messiest indoors.
- Ice melt and color — frozen colored ice cubes, salt, droppers. Builds early science observation. Best supervised closely since ice is slippery and cold.
- Dinosaur dig — kinetic sand or oats, small dinosaur figures, a soft brush. Builds patience and fine motor precision.
- Texture collage — cotton balls, bubble wrap scraps, felt squares, pom-poms. Builds tactile vocabulary (soft, bumpy, smooth).
- Soup sensory — dry pasta shapes, wooden spoons, empty containers. Builds pretend-play language and vocabulary.
- Winter snow — instant snow powder or shaving cream, small mittens, tongs. Builds sensory regulation for kids who need calming input.
Indoor themes with dry bases (rice, pasta, oats) are your easiest weeknight option from The Best Indoor Holiday Fun Ideas for Families. Outdoor or tiled-area themes (garden mixing, ice melt, real sand) are better saved for backyard time or bath-adjacent cleanup.
Which Ages Should Use Which Sensory Bin Materials?
Matching materials to developmental stage is the single biggest safety decision you will make before a play session. As a rule of thumb:
- Infants (6 to 12 months): stick to large, soft, taste-safe items like cooked pasta shapes or oats, always with direct hand-on-hand supervision.
- Young toddlers (1 to 2 years): dry rice, dry pasta, and large scoops are appropriate, but skip anything under an inch in diameter.
- Older toddlers (2 to 3 years): kinetic sand and larger craft pom-poms become reasonable if mouthing behavior has clearly stopped.
- Preschoolers (3 to 5 years): water beads, small beads, and multi-piece sorting sets are appropriate with supervision.
Water beads are the material parents ask about most, and for good reason. They start pea-sized, swell to marble-sized within hours, and are easy to mistake for candy. Guidance from early-learning specialists is unambiguous: never use water beads with a child who still mouths toys, and always supervise directly when they are in use with any age.
Before every session, run through a short checklist:
- Play surface is easy to wipe or vacuum.
- An adult is within arm’s reach for the entire session.
- Every loose item passes the toilet-paper-tube choke test (if it fits through the tube, it is not safe for a child under three).
- Hands get washed before and after, especially with food-based fillers.
- Fillers are stored in a sealed, labeled container immediately after play.
Pro Tip: Keep water beads and small parts in a container your toddler cannot open, not just “up high.” A curious three-year-old with a step stool defeats “up high” every time.
If your child mouths non-food items well past the toddler years, shows strong aversions to certain textures, or seeks out intense sensory input in a way that disrupts daily routines, a conversation with a pediatrician or occupational therapist is worth having before you invest heavily in any one sensory bin type. Our sensory toy safety guidance covers age-specific choking and supervision standards in more depth.
How Do You Set Up, Clean, and Store a Sensory Bin Fast?
The bins that actually get used regularly are the ones that take under five minutes to set up and under five to put away. Here is a routine that holds up on a busy weeknight:
- Pull your labeled filler container and tool set from storage.
- Pour the filler into your bin or tray, about two inches deep.
- Add three or four tools, no more.
- Set a towel or mat underneath if you are indoors.
- Play, supervise, and reset the filler container the moment play ends.
Cleanup depends entirely on what is inside the bin. Dry fillers like rice, pasta, and pom-poms sweep or vacuum up in under a minute, which is exactly why they are the best choice for regular indoor use. Wet fillers, like water beads or real sand, need a drain-and-towel approach and are better reserved for bath time or an outdoor table. Sticky fillers, like anything involving shaving cream or slime, should stay on an easy-wipe surface or outside entirely.
Storage matters more than most parents expect. Keeping a dedicated “sensory supply tub” with fillers and tools ready to go removes the single biggest barrier to frequent play: the friction of assembling everything from scratch each time. Rotate two or three fillers in and out every couple of weeks to keep things interesting without needing to buy new materials constantly. Our guide to Montessori toy storage has more on organizing a rotation system that actually gets used.
Reuse dry fillers for months if you store them sealed and dry between sessions. That single habit cuts your ongoing sensory play cost close to zero.
How to Choose the Right Sensory Bin Kit: Price and Safety Checklist
Shopping for a kit gets easier once you know which dimensions actually matter. Compare options across six criteria: best-for age or skill level, price, what is included, safety and age rating, how reusable and easy to clean it is, and the primary learning focus (fine motor, tactile input, sensory regulation).
Budget DIY-style kits tend to include a single filler and one or two tools, aimed at parents who want a starting point rather than a full curriculum. Mid-range curated kits add multiple tools, theme cards, and a wider filler variety, usually with a stated age range and safety documentation. Premium and classroom-scale sets scale up quantity and durability for repeated group use, with sturdier bins meant to survive years of daily handling.
Before buying, scan the product page and reviews for these signals:
- A specific age range, not a vague “toddlers and up.”
- A clear non-toxic or material-safety claim.
- A full itemized list of what ships in the box.
- Whether refills are sold separately, since this affects long-term cost.
- Reviews that mention durability after repeated use, not just first impressions.
Run through a five-question checklist while browsing: Does it list an age range? Does it name the materials? Does it disclose everything included? Can you buy refills? Do reviews mention it holding up over time? If you answer “no” to more than one, keep looking.
One consideration worth noting for container choice: a clear, wide plastic tub often beats a specialty sensory table on visibility and surface area, and it costs less. If a kit’s included container is opaque or narrow, a swap to a clear under-bed tub is an easy upgrade.
How We Vet Sensory Bin Toys and Kits at Best Kids Toys
Curating a sensory bin lineup means checking the same details we ask you to check, before a single product goes up for sale. Every kit we recommend passes through a review of safety testing, age-appropriate design, non-toxic material sourcing, and durability under repeated, real-world play.
A bin built for genuine exploration does not need to look Instagram-perfect to work. What matters is that a child’s hands are free to dig, pour, sort, and repeat, using materials an adult has already confirmed are safe for that child’s stage.
That principle, backed by developmental guidance on sensory play, shapes how Thebestkidstoys selects every kit in the collection. Our review process checks for:
- Third-party or manufacturer safety testing on every filler and small part.
- Age recommendations that match the actual contents, not just the marketing copy.
- Montessori-aligned learning goals: fine motor precision, sorting, language, and sensory regulation.
- Durable, refillable components so a kit outlasts a single season of play.
Contributing author Danica Hodge has reviewed this guidance against the same standards Thebestkidstoys applies to its own catalog, so the checklist above works whether you are shopping our shelves or a competitor’s page. Our background on infant sensory development covers why these design choices matter starting from the earliest stages.
What Do Other Parents Say About Their Sensory Bins?
Reviews are one of the fastest ways to sort a genuinely good kit from an attractive product photo. Look past the star rating and read for specifics: does the reviewer mention how long the filler lasted, whether pieces broke, or whether their child’s age matched the recommendation?
The most useful reviews tend to answer three questions you cannot get from a product description alone. First, did the contents match what was advertised? Kits with vague “assorted items” descriptions draw more complaints about mismatched expectations than kits with itemized lists. Second, how did it hold up after repeated use? A scoop that cracks after three sessions is a different product than one still going strong after a month. Third, was the age recommendation accurate for a real child, not just a marketing range?
When you are comparing kits, weight reviews that mention specific ages and specific outcomes over generic five-star praise with no detail. “My 2-year-old used the tongs independently within a week” tells you more than “great product, my kid loves it.” Look for a pattern across several reviews rather than trusting any single glowing or critical one in isolation. A kit with dozens of reviews mentioning durability after months of use is a stronger bet than one with a handful of reviews from the first week of ownership.
Choosing Sensory Bins for Sensitive or Sensory-Seeking Kids
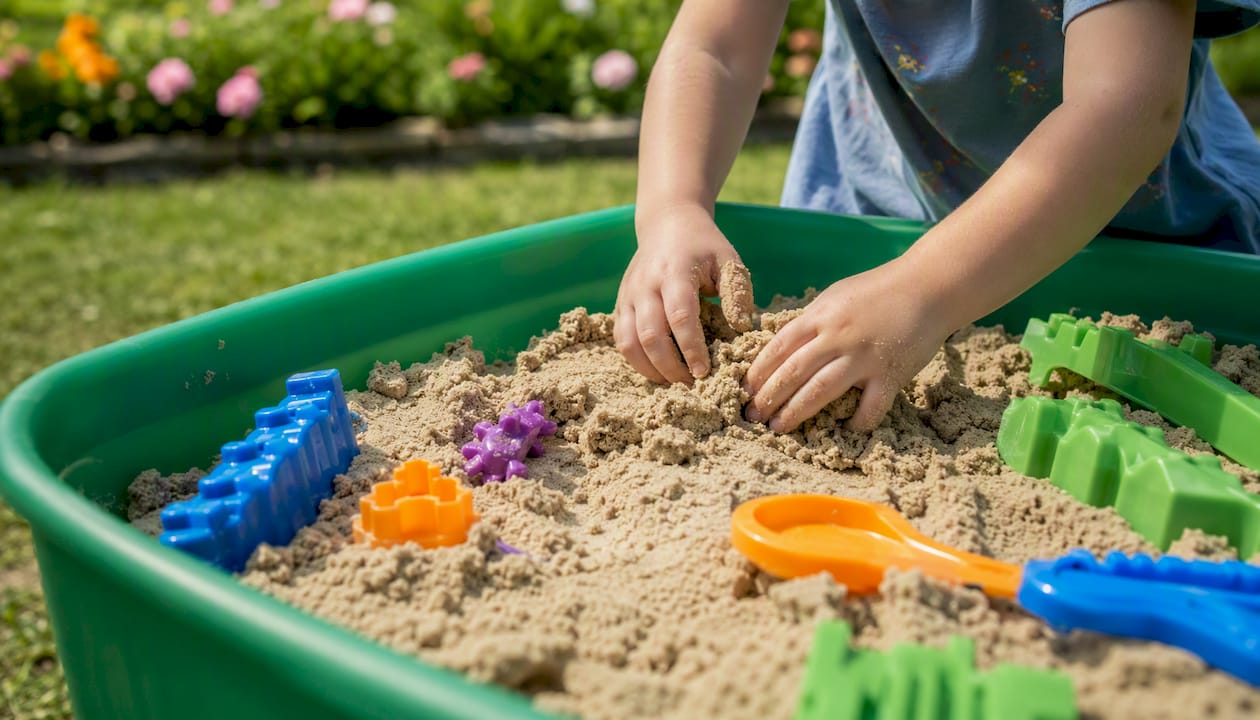
Not every child responds to sensory play the same way, and that is worth planning for before you buy. Some kids seek out intense input: they want to dig hands deep into dry rice or press firmly into kinetic sand. Others are sensitive to texture and need a gentler entry point.
For a sensory-avoidant child, start with familiar, low-intensity textures like dry rice or smooth pasta shapes rather than jumping straight to kinetic sand or water beads, which carry stronger textural feedback. Let the child control the pace, including the option to use tools instead of bare hands if direct contact feels like too much. Offering a scoop or tongs first, with hands-in-filler as an invitation rather than a requirement, tends to lower resistance.
For a sensory-seeking child, materials with more resistance, like dried beans, kinetic sand, or rice with added weight from small stones, tend to hold attention longer than lighter fillers like cotton balls. Larger bins with more surface area also give seeking kids more room to dig without hitting the edges constantly.
If your child has a diagnosed sensory processing difference, loop in an occupational therapist before investing in a full kit lineup. A therapist can point you toward specific textures and resistances that match your child’s individual profile, which turns a general-purpose kit into a genuinely targeted tool.
A Parent’s Take on Making Sensory Bins Stick
The bins that actually got used in our house were never the ones that looked good in photos. They were the boring rice bin kept in a labeled tub under the play table, ready in ninety seconds flat. The elaborate dyed-rainbow-rice bin I spent an hour prepping got played with once and then sat forgotten because resetting it felt like too much work.
The single change that made sensory play a regular habit, not an occasional project, was keeping one supply tub packed and ready at all times. No shopping, no measuring, no decision fatigue at 5 p.m. Just pull the tub, pour, and let her dig in while dinner finishes cooking.
Ready to Skip the Prep? Shop Vetted Sensory Kits
If everything above sounds right but you would rather skip the shopping list entirely, a curated kit gets your child playing today instead of after a weekend supply run. Thebestkidstoys builds every sensory kit around the same checklist covered here: age-rated contents, non-toxic materials, and tools sized for small hands, so you are not left guessing whether a filler is safe for your toddler.
The Little Learners Montessori busy book is a strong next step if you want hands-on, tactile learning without loose fillers to manage, and it ships with the same safety review every Thebestkidstoys product goes through. Parents assembling a bundle for a birthday or holiday gift can also browse our collaboration collection for curated sets built with the same age-rated, refillable standards. Orders over $60 ship free, so stocking a full sensory rotation costs less than piecing one together from three different stores.
Frequently Asked Questions
What age is appropriate for sensory bin toys? Most sensory bins work from around 12 months on, as long as fillers match the child’s mouthing stage. Dry, taste-safe fillers suit young toddlers, while water beads and small parts are better reserved for preschoolers with reliable no-mouthing habits.
Are sensory bin toys safe for kids who still put things in their mouths? Yes, if you stick to taste-safe fillers like cooked pasta, dry oats, or rice, and skip water beads and small plastic pieces entirely until mouthing behavior has stopped.
Is it cheaper to buy a sensory bin kit or make one myself? DIY bins are almost always cheaper upfront since you are buying pantry staples and a plastic tub. A vetted kit costs more but saves the shopping time and includes safety-checked, age-labeled contents you would otherwise need to research yourself.
How often should you rotate sensory bin themes? Every two to three weeks keeps a bin novel without requiring new material purchases each time. Rotating just the tools while keeping the same filler base is often enough to renew interest.
What sensory bin fillers should I avoid for toddlers? Water beads top the list for children who still mouth toys, since they are small at first but swell dramatically when wet and pose a serious ingestion risk. Small craft beads, buttons, and anything under an inch in diameter carry similar choking concerns.
Sources
- Sensory Bins for Toddlers: Our Favorite Ideas and Items | NAPA Center
- Sensory Bin Basics: What You Need to Have - Busy Toddler
- 21 Best Sensory Bin Filler Ideas - Little Bins for Little Hands
- 100 of the best non-food sensory table material ideas
- Sensory bin table ideas — Erin Szoch