



Mud Kitchen Ideas for Busy Parents: Setups That Stick
Here’s your one-sentence starter plan: pick a spot near your back door or a hose, set up a knee-to-hip-height surface, and gather six household items before dinner tonight. You genuinely can have a working mud kitchen ready in under 30 minutes, and setup can cost anywhere from $0 to $75 depending on what you already own versus what you buy new.
The location matters more than the equipment. Placing the kitchen near a water source or back door is the single biggest factor in whether kids actually use it every day, not the fanciest Pinterest build tucked at the back of the yard. Grab these before you do anything else:
- An old muffin tin or ice cube tray
- Two or three mixing bowls you no longer love
- A handful of wooden or metal spoons
- A small funnel
- A plastic basin or dish tub for “washing up”
- Measuring cups (even mismatched ones work)
- A scoop or small shovel
- A container of water, refilled from the hose or a jug
Set that pile on any sturdy surface, a card table, an overturned crate, an old changing table, and you have a functional mud kitchen. Everything after this point is about making it better, safer, and more fun over time.
Key Takeaways
A working mud kitchen depends on three factors in order of importance: proximity to water and a door, functional drainage, and a counter height matched to your child’s size.
| Point | Details |
|---|---|
| Placement drives daily use | Set the kitchen near a water source or back door, not a distant corner of the yard. |
| Start small and cheap | A basic setup can run from $0 to $75 and take under an hour to assemble. |
| Drainage prevents rot | Leave slat gaps and route sink water through PVC onto gravel to avoid a swampy base. |
| Match height to age | Counters around 18 to 30 inches, scaled by age, keep play comfortable rather than a stretch. |
| Rotate materials seasonally | Swap in petals, leaves, or snow bricks by season to renew interest without new tools. |
Build Plans and Guides Worth Bookmarking
For full construction plans, Ana White’s free woodworking plans cover a complete sink build. For drainage and placement detail, Yardtopia’s build guide walks through PVC routing and pallet safety.
Table of Contents
- What Are the Real Benefits of Mud Kitchen Play?
- Three Mud Kitchen Setups You Can Copy Today
- Building Your Starter Toolkit Without Overspending
- Seasonal Mud Kitchen Activities to Keep Play Fresh
- DIY Mud Kitchen Builds and Weatherproofing Hacks
- Matching the Kitchen to Your Child’s Age and Stage
- Safety and Hygiene Rules Worth Setting on Day One
- Frequently Asked Questions
- Let’s Get One Started This Weekend
- Sources
What Are the Real Benefits of Mud Kitchen Play?
A mud kitchen is a stand of open shelves, basins, and tools set outdoors where kids mix dirt, water, and found materials into safe play gear recipes. It looks like messy fun. It is also one of the more effective, screen-free ways to build fine motor control and early number sense in kids ages 2 through 9.
Pouring water from a jug into a narrow-necked bottle takes real wrist control. Scooping dry soil into a measuring cup and leveling it off builds the same hand strength that later helps with pencil grip and buttoning a coat. Mud kitchens support sensory exploration, fine motor skills, and early math and science concepts through the simple act of mixing, measuring, and watching cause and effect unfold, which is a longer way of saying that “making mud soup” is quietly teaching volume, ratio, and prediction.
The learning stacks up fast once you look for it:
- Fine motor practice: pouring, stirring, and pinching herbs strengthens the small muscles used for writing.
- Early STEM thinking: measuring cups plus water plus dirt equals an ongoing experiment in ratios and texture.
- Language growth: kids narrate their “recipes,” which pushes vocabulary around temperature, texture, and quantity.
- Social skills: siblings and friends negotiate who stirs, who serves, and who gets the “customer” role.
For toddlers, the appeal is almost entirely sensory. By kindergarten age, kids start running actual experiments, dry mud versus wet mud, three scoops versus five. That range is exactly why a mud kitchen holds a child’s interest for years rather than months, unlike toys that get outgrown in a season.
Three Mud Kitchen Setups You Can Copy Today
Space decides the setup more than budget does. Here are three templates, pick the one that matches your yard, patio, or apartment balcony, and build from there.
1. The Backyard Classic
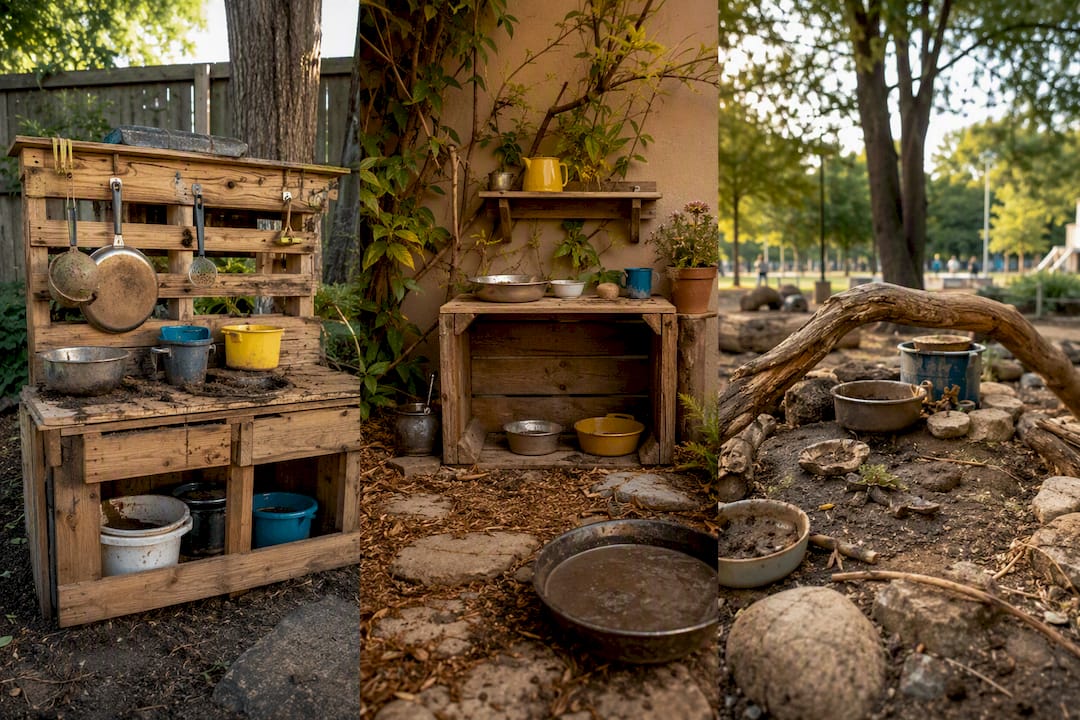
This is the setup most people picture: a pallet or thrifted table against a fence, with a basin sink and a water source within reach.
- Find a pallet, an old changing table, or a garage-sale kitchen island. Anything with a flat top and some open shelving underneath works.
- Position it within a few steps of your back door or an outdoor hose bib. This single decision drives daily use more than any accessory you add later.
- Set a plastic basin or an old sink insert into a cutout or simply on top as the “sink.”
- Fill a jug or a small camping water container and place it beside the basin.
- Line the ground beneath with gravel or mulch so runoff doesn’t pool into mud where kids stand.
2. The Small Patio or Balcony Kitchen
Apartment life doesn’t rule out mud play. A well-chosen tote or storage tub paired with a spigot beverage dispenser recreates most of what a full-sized kitchen offers, just at a smaller footprint.
- Use a large plastic tote as the base “counter,” turned on its side or topped with a board.
- Fill a beverage dispenser with a push spigot with water and set it on top, this becomes the working faucet.
- Lay a rubber tray mat or an old cookie sheet underneath to protect the patio surface from stains.
- Keep the potting soil or play sand in a lidded bin right beside it so cleanup takes seconds.
3. The Portable Bin Kitchen
For families short on outdoor space or renting somewhere that limits permanent structures, a rolling cart or a single storage tub does the job.
- Choose a wheeled utility cart or a deep storage tub with a lid.
- Pack it with your starter kit: bowls, spoons, funnel, small shovel.
- Roll or carry it to a patch of dirt, a sandbox, or even a grassy corner for play sessions.
- Pack everything back inside and snap the lid shut when playtime ends.
Pro Tip: Keep a small camping water container with a push-button spigot in your portable kit. It gives kids a satisfying, tap-like pour without needing a hose nearby, and it packs away in seconds.
Building Your Starter Toolkit Without Overspending
You don’t need a themed catalog of mud kitchen accessories to start strong. You need a short list of durable basics, and a plan for what to add once you see what your child actually gravitates toward.
Buy or gather now:
- Mixing bowls (stainless steel outlasts plastic outdoors)
- Wooden spoons and one sturdy metal whisk
- A funnel
- A muffin tin (bonus points for one with 12 wells for counting games)
- A plastic basin for the “sink”
- Measuring cups, ideally a mismatched set from a thrift store
Common supply lists across most how-to guides land on nearly the same core group: bowls, spoons, muffin tins, funnels, measuring cups, strainers, and recyclable containers. That overlap tells you something useful: the “essential” tier is genuinely small, and everything past it is optional flair.
Add later, once the basics get regular use:
- A mortar and pestle for grinding leaves or petals into “spice”
- Mini whisks sized for smaller hands
- Cupcake liners and cookie cutters for themed baking play
- A small chalkboard for writing daily “menus”
For sourcing, thrift stores and dollar stores are your best friends here. Mismatched bowls, dented muffin tins, and single-use kitchen gadgets nobody wants indoors get a full second life outside. Avoid thin, rust-prone metal that flakes after a season of rain, and skip treated lumber scraps from unknown sources, since some coatings aren’t safe for a surface kids will touch constantly.
Once you’ve got more than a dozen pieces, a labeled bin per category (stirring tools, containers, “baking” gear) keeps setup and teardown fast enough that you’ll actually keep doing it.
Seasonal Mud Kitchen Activities to Keep Play Fresh
Even the best mud kitchen setup goes stale if the ingredients never change. Rotating what’s available, without buying a single new tool, is often enough to make kids show up excited again.
Summer is peak mud season, so lean into water-heavy sensory play:
- Petal potions: crushed flowers plus water in a jar, shaken and “sold” as perfume
- Scented water stations using mint or basil from the garden
- Ice cube treasures, freeze small toys inside cubes and let kids “rescue” them with warm water
Fall brings a new set of raw materials underfoot:
- Leaf confetti bakery: crushed dry leaves become “flour” for pretend cakes
- Pinecone pizzas topped with berries, seed pods, or mud “cheese”
- Counting games sorting acorns by size into muffin tin wells
Winter doesn’t have to shut the kitchen down entirely, just shorten the sessions and adjust the materials:
- Snow bricks stacked as walls for a “bakery counter”
- Melting experiments comparing how fast ice cubes disappear in warm versus cold water
Spring resets everything with new growth:
- Blossom teas steeped from fallen petals
- Seed-sorting by size or color before planting
- Simple planting prompts, pressing seeds into mud “cups” to watch what sprouts
DIY Mud Kitchen Builds and Weatherproofing Hacks
If you’re ready to build something semi-permanent, a handful of carpentry basics separate a kitchen that lasts three seasons from one that rots after the first rainy month.
- Start with the countertop. Pallet wood works well for a rustic top, but leave roughly a 1/8 inch gap between slats. That small gap lets rainwater drain through instead of pooling and warping the wood.
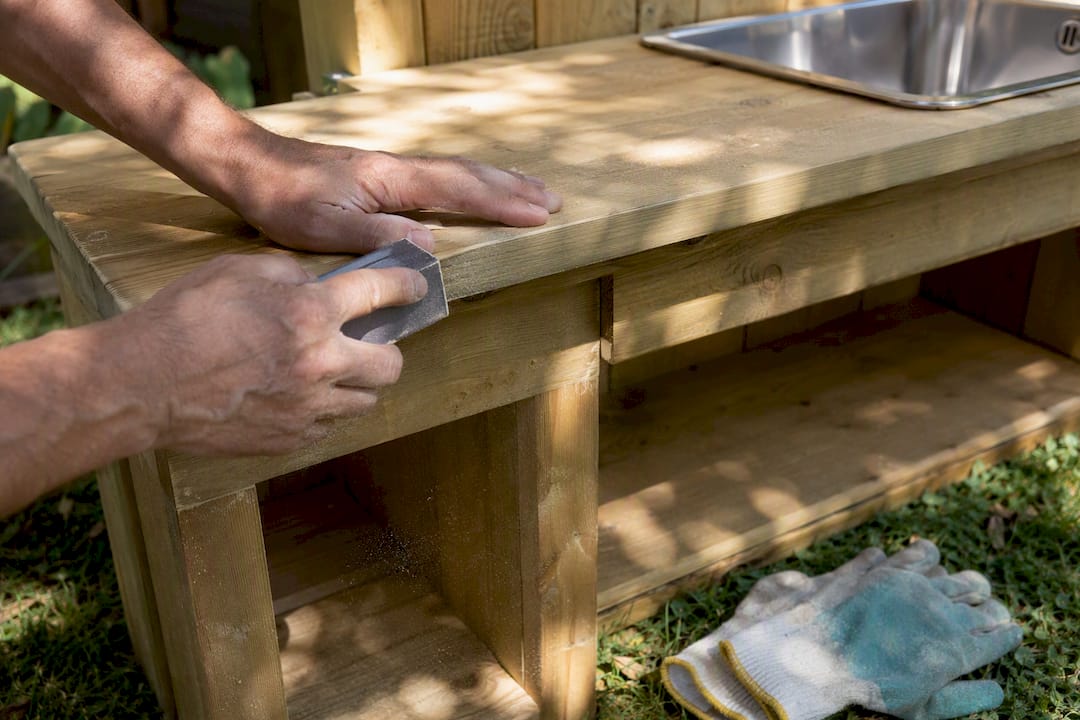
- Choose the right pallet. Avoid pallets stamped “MB,” which means they were treated with methyl bromide; look for “HT” (heat treated) stamps instead, then sand every surface your child will touch.
- Build or install a sink. Three options work well: set a mixing bowl into a cutout for a simple basin sink, mount a camping water container with a spigot for a working “faucet” feel, or go further and drill a drain hole connected to a short length of PVC pipe that routes water onto gravel below, which keeps the base from turning into a swamp.
- Seal it against weather. A water-based outdoor sealer or exterior paint protects wood from splitting and graying within a season.
- Check for full plans if you want precision. Free plans exist for a sturdy wooden mud kitchen complete with a working sink, cut list, and hardware recommendations, and cedar or treated lumber is worth the extra cost for a build meant to survive multiple years outdoors.
| Build Element | What to Use | Why It Matters |
|---|---|---|
| Countertop | Pallet wood with 1/8 inch slat gaps | Lets rain drain instead of pooling and warping the surface |
| Sink | Mixing bowl inset or camping water container with spigot | Delivers a working “faucet” feel without plumbing |
| Drainage | Drilled hole plus short PVC pipe to gravel | Prevents standing water and base rot |
| Finish | Water-based outdoor sealer or exterior paint | Slows splitting, graying, and splinter risk |
| Lumber choice | HT-stamped pallets or cedar/treated wood | Avoids chemical treatment risk and extends structure life |
Pro Tip: Before you paint or seal anything, run your hand along every edge your child will touch. Sand rough spots now, since splinters are the number one reason a beautiful DIY build gets quietly abandoned.
Matching the Kitchen to Your Child’s Age and Stage
Counter height and tool size do more for engagement than any accessory on the market. A surface that’s too tall turns play into a stretch instead of a game, and tools sized for adult hands frustrate toddlers fast.
- Ages 2 to 3: counter height around hip level (roughly 18 to 20 inches), paired with big-grip spoons and soft-edged scoops that small fists can actually close around.
- Ages 3 to 5: counter height near 20 to 24 inches works well, and this is the stage to introduce real measuring cups, small funnels, and a muffin tin for counting play.
- Ages 6 to 9: a taller surface around 26 to 30 inches suits growing kids, and tools can get more specific, mortar and pestle, mini whisks, even a chalkboard for writing menus.
Simple prompts stretch the learning further at any age: ask a toddler to count how many scoops fill a bowl, hand a five-year-old paper to sketch out a “menu,” or challenge a seven-year-old to test whether wet mud or dry mud holds its shape longer in a mold.
Safety and Hygiene Rules Worth Setting on Day One
A few clear rules up front save you from bigger headaches later, and they take almost no time to put into practice.
- Supervise water play closely with toddlers, and dump standing water in basins or buckets after every session so it doesn’t sit overnight.
- Choose soil that hasn’t been treated with pesticides or herbicides, especially if younger kids are likely to put fingers in their mouths.
- Note any known allergies, some kids react to certain plants, pollen, or molds, and steer ingredient choices around them.
- Rinse tools after play and let them air-dry in the sun, which naturally helps limit bacterial buildup.
- Require a quick handwash before anyone heads inside for a snack.
- Store dry goods like flour substitutes or oats in covered bins to avoid attracting bugs, and toss any organic material (petals, herbs) once it starts to smell or mold.
Pro Tip: Keep a small bottle of hand sanitizer clipped near the kitchen for the gap between “done playing” and “reaching the sink,” since kids rarely remember to wash hands the moment you ask.
Keeping the Kitchen Ready Season After Season
A mud kitchen earns its keep when upkeep stays simple. Cover utensils or stack them in a lidded bin between sessions, and rotate seasonal materials (petals in summer, leaves in fall) so nothing sits and rots in a corner. Reseal wood surfaces once a year, usually in early spring, to keep splitting at bay.
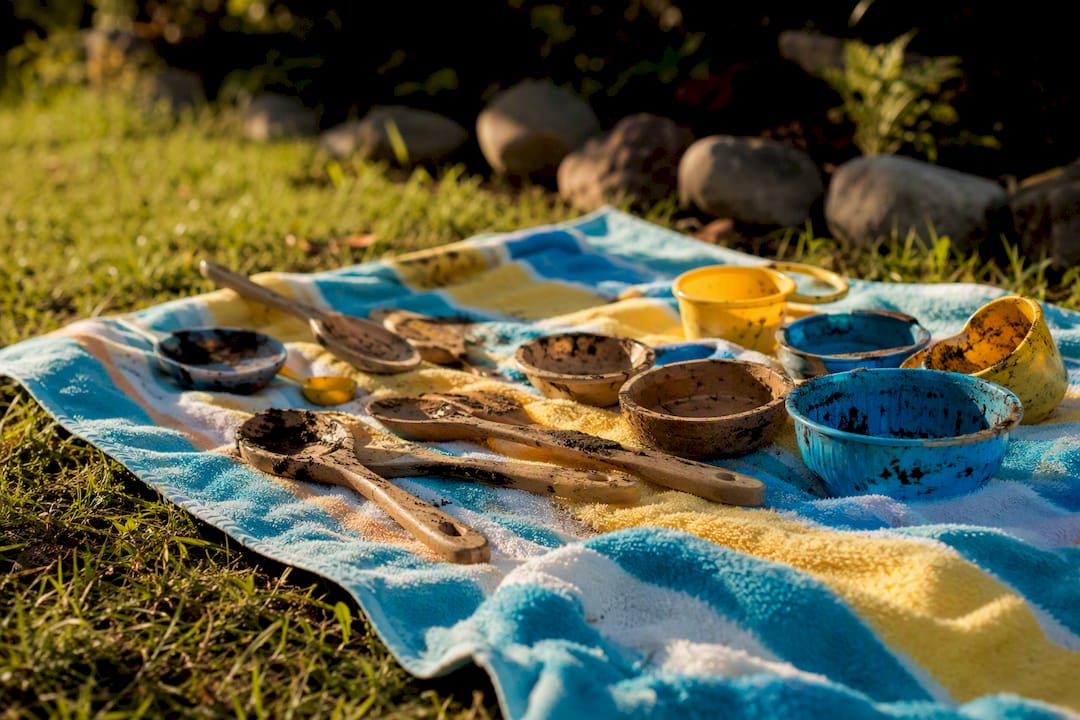
End-of-play cleanup takes minutes: hose down muddy tools, let them sun-dry on a towel, then stack everything back into bins. When a spoon snaps or a bowl cracks, don’t toss it immediately, cracked bowls often make great planters, and broken spoon handles work fine as garden markers. Replace anything with sharp edges or rust right away rather than waiting for it to become a problem.
What Actually Drives Mud Kitchen Success
The research behind this guide points to three priorities above everything else: make the kitchen accessible near water and a door, build in real drainage from day one, and match the counter height to your child’s actual size rather than a generic template. Thebestkidstoys built its own approach to outdoor and Montessori-inspired play around that same principle, accessibility and appropriate scale beat elaborate design every time. Pairing a mud kitchen with outdoor toys designed around Montessori spring activities extends that same philosophy into the rest of your yard, giving kids more open-ended, screen-free ways to explore independently.
Frequently Asked Questions
How much does it cost to start a mud kitchen? Most families spend between $0 and $75, since a basic setup runs on thrifted bowls, a repurposed table, and a garden hose. Building a full wooden structure with a real sink pushes costs higher depending on lumber choices.
What age is best to start mud kitchen play? Kids as young as two enjoy the sensory side of pouring and scooping, while the same setup keeps offering new challenges through age nine as measuring, counting, and experimenting get more advanced.
Do I need a real plumbed sink? No. A basin insert or a camping water container with a spigot gives kids the “working faucet” feeling without any plumbing work at all.
How do I stop the area from turning into a swamp? Leave small drainage gaps in your countertop slats, route any sink drainage through a short PVC pipe onto gravel, and dump standing water in basins after each play session.
What should I avoid using in a mud kitchen? Skip pallets stamped “MB” (methyl bromide treated), thin metal that rusts quickly, and any soil treated with pesticides or herbicides.
Let’s Get One Started This Weekend
Here’s the honest read on mud kitchens: most advice online obsesses over the build, the perfect pallet, the cutest paint color, when the real driver of daily play is placement. A gorgeous kitchen tucked at the far end of the yard gets ignored. A plain plastic tub sitting three steps from the back door gets used every single afternoon.
That’s the gap conventional advice misses. Parents plan for the Pinterest version and skip the boring decision that actually matters: put it where water and supervision are both easy. Drainage comes second, since a swampy, rotting base kills enthusiasm fast even when the location is perfect. Counter height comes third, matched honestly to your child’s size rather than what looks nice in photos.
If you’re starting today, skip the elaborate build entirely. Grab a tub, some bowls, a spoon, and set it three steps from your door. Upgrade later once you see what your child actually does with it.
Sources
- How to build a mud kitchen | Yardtopia
- Mud Kitchen 101: Benefits, setup ideas, and must-have supplies | Jeni Utley
- How to set up a mud kitchen for kids | Tierney Family Farms
- Mud Kitchen Play Ideas for Kids | Thimble and Twig