



Design a Toy Ideas: A Creative Parent's 2026 Guide
Toy design is defined as the process of creating age-appropriate, safe, and engaging playthings that serve a child’s physical, cognitive, and emotional development. When you set out to design a toy ideas list for your child, you are doing more than crafting something fun. You are building a tool for learning. The best toy concepts blend open-ended play with developmental goals, drawing on Montessori principles, ergonomic thinking, and modern prototyping technology. This guide walks you through every stage, from brainstorming creative toy ideas to printing a finished prototype, so your imagination can meet your child’s real needs.
What tools and materials do you need to design a toy?
Every great toy starts with the right materials and a clear plan. For physical prototyping, the most practical materials are cardboard, untreated wood, child-safe plastics, and natural fabrics. Each offers a different sensory experience and teaches you something different about durability before you commit to a final build.

Digital tools have changed the game for parents and hobbyists. AI-powered platforms like Sloyd.ai and Meshy let you generate a 3D model from a simple sketch in minutes. AI-generated base meshes are ready in roughly 90 seconds, with textured files following in about 2 minutes. That speed means you can test three concept variations in an afternoon instead of a week.
| Tool type | Best use | Output format |
|---|---|---|
| AI sketch converter (e.g., Sloyd.ai) | Sketch to 3D model | STL, OBJ |
| 3D slicer software | Prepare model for printing | G-code |
| Cardboard prototyping | Fast physical mockup | Physical model |
| CAD software (e.g., Tinkercad) | Precise geometry editing | STL, OBJ |
Tinkercad is free, browser-based, and genuinely beginner-friendly. It pairs well with AI-generated base models when you need to refine edges or add functional details.
Pro Tip: Choose child-safe, non-toxic materials from the very first prototype. Habits formed early in the design process carry through to the final product, saving you costly rework later.
How do you brainstorm creative, educational toy design concepts?
Strong toy design concepts start with research, not sketching. Before you draw a single line, spend time observing how your child actually plays. Watch which objects hold attention longest, which textures they reach for, and which challenges make their brain gears churn without causing frustration.
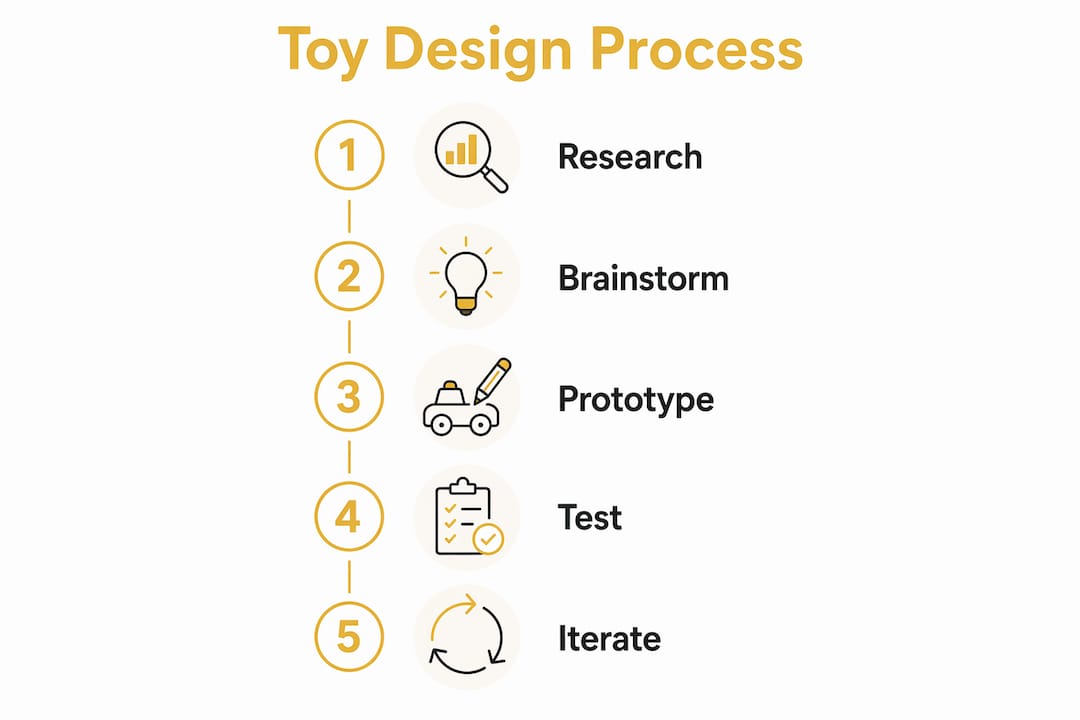
A structured design process covers research, brainstorming, prototyping, and iteration across a full design cycle. That framework applies whether you are a professional or a parent working at the kitchen table. The key discipline is generating at least three distinct concepts before committing to one. Variety forces you to think beyond your first instinct.
Child-centered design means resisting the urge to simply shrink adult objects. Successful toy design prioritizes ergonomic grips and intuitive connections that enable child independence, not scaled-down versions of grown-up tools. A child’s hand, grip strength, and attention span are entirely different from an adult’s.
Here are proven ideation methods for generating kids toy design suggestions:
- Observe first, sketch second. Watch a child play for 20 minutes before touching a pencil.
- Map to a developmental stage. Choose one skill to target: pincer grip, color recognition, cause-and-effect reasoning.
- Use constraints as fuel. Limit yourself to three materials or one color palette to spark creativity.
- Borrow from nature. Shapes found in leaves, shells, and rocks are naturally ergonomic and visually calming.
- Think in stages. Design for who the child is now and who they will be in six months.
You can also draw inspiration from educational books that spark creativity to see how other educational product designers structure learning progressions for young children.
How do you prototype and test your toy designs effectively?
Prototyping is where ideas become real, and where most first-time designers learn the most. The goal of an early prototype is not perfection. It is feedback. Build something a child can hold, and watch what happens.
Open-ended, modular play systems increase child focus and lower parental stress compared to overly complex, prescriptive toys. That finding should shape every prototype you build. If a child needs instructions to play with it, simplify the design.
- Sketch three concepts. Draw front, side, and top views. Keep lines dark on a light background for AI conversion.
- Build a cardboard mock-up. Cut, fold, and tape a rough version in under an hour. Size and proportion matter more than finish at this stage.
- Convert your best sketch to 3D. Use an AI tool or Tinkercad to generate a digital model.
- Slice and print a test piece. Print at low infill first to check proportions before committing to a full print.
- Test with a child. Observe without coaching. Note what they ignore, what they grab, and what breaks.
- Iterate. Adjust geometry, size, or texture based on what you observed. Repeat steps 4 and 5 at least twice.
Common prototyping mistakes include making parts too thin, ignoring rounded edges, and skipping child testing entirely. A part that looks solid on screen can snap in a toddler’s hand in seconds.
For parents who want to add interactive elements, platforms like Scratch and Micro:bit let you embed simple coding and circuitry into toy prototypes without advanced engineering knowledge. A button that triggers a light or sound adds enormous play value for school-age children.
Pro Tip: Test your prototype with a child who has never seen it before. Familiar children adapt to your design’s quirks. A fresh pair of eyes reveals the real usability gaps.
How do you integrate educational goals and safe design principles?
The best toys teach something without feeling like school. Multifunctional toys that evolve across developmental stages extend play value and deliver developmental benefits across infancy and toddlerhood. A toy that works as a teether at four months and a stacker at twelve months gives families more value and children more growth.
Safety is not a checklist item. It is a design philosophy. Every material, edge, and fastener must be evaluated for a child’s worst-case interaction with it, not their best-case use.
Key safety and design considerations:
- Use only non-toxic, food-grade finishes on any toy a child under three might mouth.
- Round all external edges to a minimum radius that eliminates pinch points.
- Size all parts above the choking hazard threshold for the target age group.
- Test structural integrity by applying force well beyond what a child could realistically generate.
- Choose natural or muted color palettes. Minimalist designs with muted colors reduce overstimulation and support sensory exploration.
| Feature | Why it matters |
|---|---|
| Educational value | Targets a specific developmental skill |
| Safety | Non-toxic materials, no sharp edges, correct part sizing |
| Durability | Survives repeated drops and rough handling |
| Sustainability | Natural or recycled materials reduce environmental impact |
| Multifunctionality | Grows with the child across multiple age stages |
Understanding how play-based learning boosts cognitive growth helps you connect each design decision to a real developmental outcome. That connection is what separates a toy from a trinket.
What modern technologies enhance toy design and production?
3D printing has made DIY toy design inspiration accessible to anyone with a home printer and a good idea. The technology removes the barrier between concept and physical object, letting you iterate in days rather than months.
Sketch quality is the single biggest factor in AI model accuracy. AI tools read shaded areas as geometry, so clean, high-contrast drawings with isolated subjects and front-facing poses produce the most accurate models. A messy sketch wastes your 90-second window and produces a model you cannot use.
| Parameter | Recommended setting for toys |
|---|---|
| Material | PLA or PETG (non-toxic, food-safe options available) |
| Wall thickness | Minimum 2.4 mm for structural parts |
| Infill | 40%–60% for durability |
| Edge treatment | Rounded fillets, no sharp overhangs |
Post-processing matters as much as printing. Sand printed parts to remove layer lines that can catch small fingers. Apply a child-safe sealant if the toy will be used outdoors or mouthed frequently. Slicer settings optimized for engineering parts often fail for toy printing because they prioritize speed over safety. Always use a toy-specific profile.
Home printing costs less per unit but requires time and skill. Print-on-demand services cost more per piece but deliver professional finishes without equipment investment. For a one-off gift or prototype, print-on-demand is often the smarter choice.
Pro Tip: Use specialized slicer profiles built for toy printing rather than adapting engineering profiles. The difference in edge quality and wall integrity is significant and directly affects child safety.
Key Takeaways
Designing educational toys that genuinely engage children requires combining child-centered research, open-ended play principles, and modern prototyping tools from the very first concept sketch.
| Point | Details |
|---|---|
| Start with observation | Watch how children play before sketching any concept to ground your design in real behavior. |
| Use AI tools for speed | AI sketch converters produce textured 3D models in roughly 2 minutes, accelerating iteration. |
| Build multifunctional toys | Toys that grow with the child across developmental stages deliver more value and longer play life. |
| Prioritize safety by design | Non-toxic materials, rounded edges, and correct part sizing must be built in from the first prototype. |
| Test with real children | Child testing reveals usability gaps that no amount of screen-based review can catch. |
What I have learned from watching children play with prototypes
The most surprising thing I have learned about toy design is that children almost never use a toy the way the designer intended. They flip it upside down, use it as a hammer, or ignore the “main feature” entirely and fixate on a small textural detail. That behavior is not a failure. It is the most honest feedback you will ever receive.
Simplicity is harder to achieve than complexity. Any designer can add features. Removing everything except what genuinely serves the child takes real discipline and repeated observation. The toys that hold attention longest in my experience are the ones with the fewest prescribed outcomes. A smooth wooden arc becomes a rocker, a bridge, a cradle, and a balance board depending on the child’s age and mood.
The biggest mistake I see parents make when they start designing is treating safety as a final review step. Safety thinking needs to live inside every creative decision, from material selection to edge geometry to part sizing. When you build that habit early, you stop second-guessing your prototypes and start trusting them.
My honest encouragement: do not wait until your idea is perfect to build it. Build the rough version, put it in front of a child, and let their reaction rewrite your assumptions. That cycle of making and observing is where the real design education happens. Thebestkidstoys was built on exactly that philosophy, and it shows in every product they curate.
— Hugh
Toys from Thebestkidstoys to inspire your next design project
Seeing well-designed educational toys up close is one of the fastest ways to sharpen your own design instincts. Thebestkidstoys curates a collection of Montessori-inspired playthings that show exactly how safety, multifunctionality, and developmental value come together in a single product.
The infant development toy collection for babies aged 0–12 months is a particularly rich source of inspiration. Every item in that range has been reviewed for quality, safety, and long-term play value. The Little Astronaut Busy Book is a standout example of open-ended design that keeps young minds engaged through textures, colors, and interactive pages. Browse the full selection at Thebestkidstoys, where free shipping applies on orders over $60 and current promotions make quality toys more accessible for every family.
FAQ
What is the first step to design a toy idea?
The first step is observing how children in your target age group actually play. Research their developmental stage before sketching any concept, so your design targets a real skill or need.
What materials are safest for DIY toy prototypes?
Untreated wood, food-grade PLA plastic, and natural fabrics are the safest choices for DIY prototypes. Always avoid toxic finishes, sharp edges, and small parts for children under three.
How does AI help with toy design?
AI sketch-to-3D tools convert a clean drawing into a textured, production-ready model in roughly 2 minutes. That speed lets you test multiple concepts in a single session rather than waiting days for a manual model.
What makes a toy educational?
An educational toy targets at least one specific developmental skill, such as fine motor control, color recognition, or cause-and-effect reasoning, while allowing open-ended exploration rather than prescribing a single correct outcome.
How do you test a toy prototype with children?
Place the prototype in front of a child who has not seen it before and observe without coaching. Note what they grab, what they ignore, and what breaks, then use those observations to guide your next iteration.